Your sourdough questions answered
keeping my starter alive, how I've adapted my favorite recipe to my own schedule + the tools that I use (tip: you don't need much)


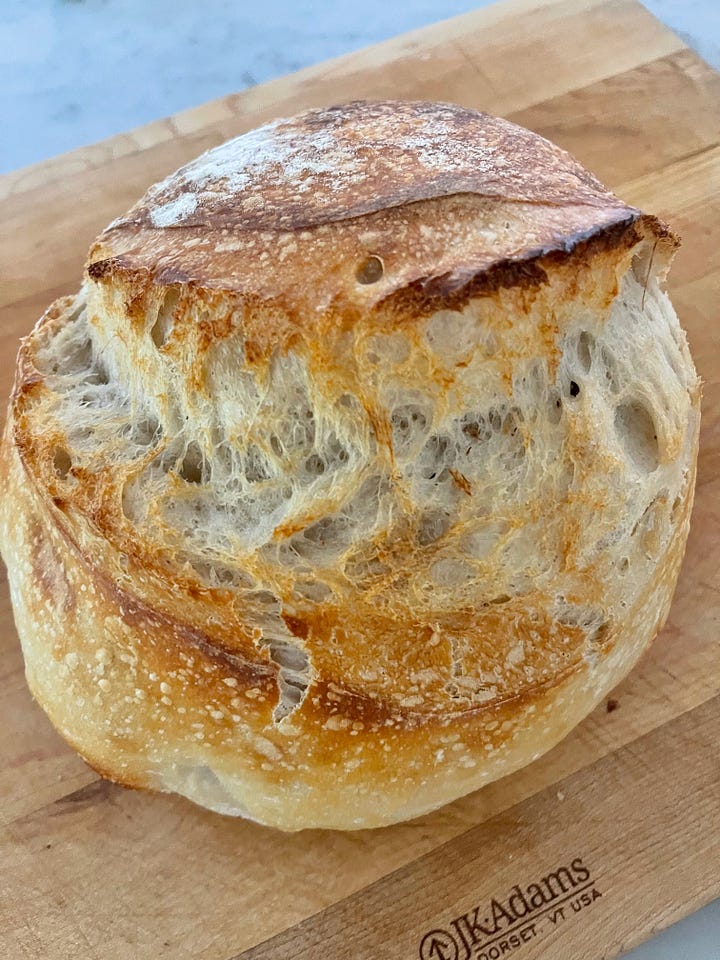
Hi everyone! Yesterday on stories I posted a picture of a fresh from the oven loaf of sourdough and got lots of questions! Pretty sure I replied to everyone but I also thought this would be the perfect place to gather all of that information into one spot. I’ve been making sourdough consistently for about 8 months. Honestly I’m not sure how we ever survived without these glorious loaves each week. They have become a staple in our household and I think they should be in your house too! Keep reading for info on my starter, recipe and tools I find helpful.
The Starter
When I first began wanting to make sourdough at home the starter 1000% intimidated me. I read A LOT about creating and maintaining one - when and how much to feed it, how much to discard, when to bake with it and what to make with the discard. But guess what, my process now involves almost none of those original methods.
After attempting (and failing) to create my own starter, I ended up getting some already active starter from a good friend of mine. She scooped out some of hers and sent me home with a jar of my very own starter plus some bread flour. I’ve been using that very same starter ever since! If possible I highly recommend going this route and getting an already active starter from a friend. There are also dehydrated starter options available to purchase, but you still have to rehydrate it and get it going into an active state yourself. By using an already active starter you also have an idea of the consistency and appearance of a healthy starter.
Feeding and maintaining my starter: Feeding your starter simply means adding flour and water. That’s it. I most often feed my starter before I go to bed with about 1/3 cup bread flour and a little less then 1/3 cup water. I do not weigh my starter, the additional flour or the additional water. You are aiming for the consistency of thick pancake batter. I then leave it on the counter over night with half the jar latched and in the morning I have an active and bubbly starter that I can use to begin my sourdough loaves.
I usually only bake sourdough once a week so the remainder of the time my starter is in the fridge! I use this jar and latch both clips when it’s in the fridge, and only one clip when it’s on the counter.
I do not discard any starter when I feed my sourdough starter. I simply feed it before I’m going to bake, use the starter I need for baking, and return the rest to the refrigerator. If a recipe calls for discard, then I use the starter directly from the fridge.
So that’s my method! Now, if you want to be an artisan baker I’m sure you need to be a little more precise…there is a lot of science involved in creating and baking the perfect loaf. But me? I’m just trying to keep our family of 6 fed with healthy and delicious bread, and this method works great for that!
The Recipe
I use this 8 hour recipe by The Real Sourdough Mama. Be sure to watch her reel on Instagram that explains the process (it goes fast but has great info). I use the exact measurements in her recipe but I do not make it in 8 hours! Here’s how I do it….I put the dough together in the morning, wait and hour and do stretch and folds, and then let it sit covered on the counter for most of the day. In the evening I separate the dough into two loaves, shape them, let them sit, shape them once more and then put them into the banneton dough bowls. All of these steps are explained in her video! She goes on to bake them later that day - but instead I cover with plastic wrap and put them in the fridge for the night. Then in the morning I’m ready to bake! Honestly I just don’t really want to be baking at night and this method works great for me!
Storing your sourdough loaves
Loaves can be wrapped up in kitchen towels (I like these) and stored on the counter for a couple days and stay fresh. You could also use a bread bag like this one. To keep them fresh even longer I love to slice up my sourdough and freeze in ziploc bags. To keep the slices from freezing together, I slip pieces of parchment paper between each slice. They are then easy to pull out and pop into the toaster!
The tools
You don’t really need too much to make a beautiful loaf of sourdough bread! Here’s what I use:
Welk Jar - to store my starter
Staub dutch oven - for baking, any dutch oven will do!
Danish dough whisk - I use this to mix the initial dough
Benneton dough bowls - proofing baskets
Parchment papers - I use these for everything! Just trim down the sides when baking in the dutch oven
I hope this info helped and has inspired you to try your own sourdough loaves! If you have any questions feel free to comment or send me a DM on Instagram!
xo, Elizabeth


